Woof Woof Woof! Don't Forget Fido's Fangs

A Guide to Dog Dental Care

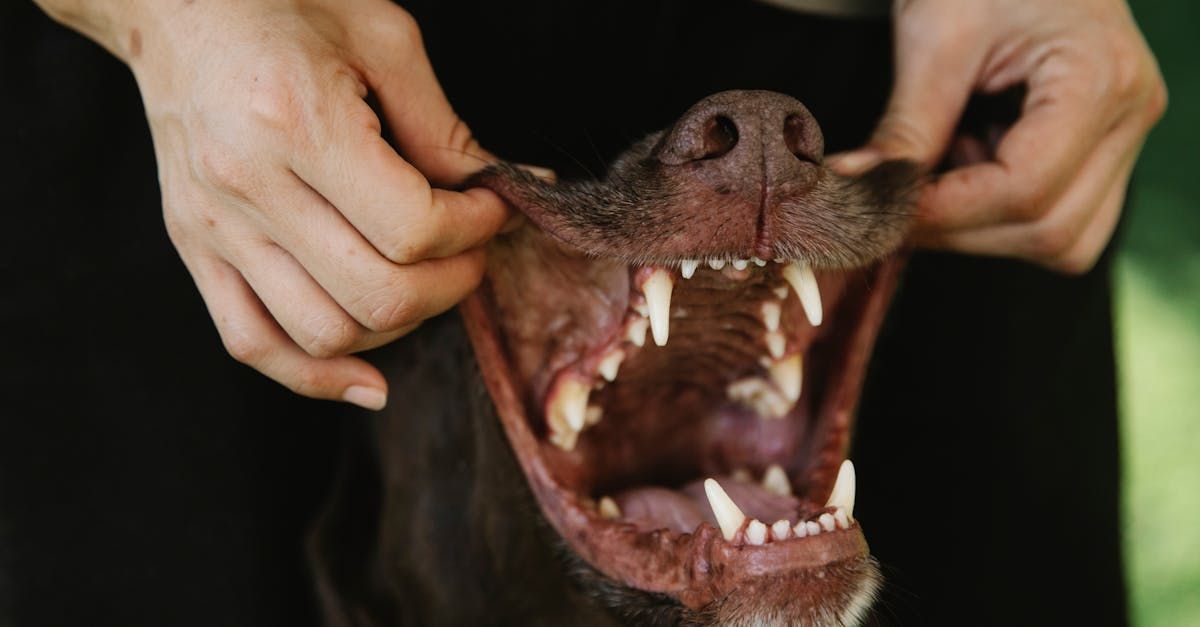
We all love our dog's slobbery kisses, but what about their dental health? Just like us, pups need regular dental care to maintain good overall health. Poor dental hygiene can lead to a number of problems in dogs, including bad breath, tooth pain, and even serious infections.

The good news is there's a lot you can do to keep your furry friend's mouth healthy and happy. Here's a guide to get you started:


Brushing Your Dog's Teeth:


This might sound strange, but brushing your dog's teeth is the gold standard for dental care. There are dog-specific toothbrushes and toothpaste available (human toothpaste is a no-no!), and getting your pup used to brushing can be a bonding experience. Start slow, letting them get used to the taste of the toothpaste and the feeling of the brush. Even if you can only manage a quick brush a few times a week, it's better than nothing!


Dental Treats and Chews:


There are a variety of dental treats and chews available that can help remove plaque and tartar buildup. Look for treats that have the Veterinary Oral Health Council (VOHC) seal of approval, which means they've been shown to be effective for dental health. These can be a great alternative to brushing, but remember they shouldn't be a total replacement.


Dental Diets:


Some dog foods are specifically formulated to promote dental health. These kibbles often have a special texture that helps scrape plaque off teeth as your dog chews. Talk to your veterinarian about whether a dental diet might be a good option for your pup.


Regular Vet Checkups:


Just like you, your dog should have regular checkups with the veterinarian. These checkups will include a dental exam, where the vet can check for any signs of problems and recommend further treatment if needed. Professional cleanings under anesthesia may be necessary to remove tartar buildup and prevent periodontal disease.


Warning Signs of Dental Problems:


Here are some signs that your dog might have dental problems:


  • Bad breath
  • Yellow or brown teeth
  • Bleeding gums
  • Difficulty chewing
  • Pawing at the face


If you notice any of these signs, be sure to schedule an appointment with your veterinarian.


Keeping Your Dog's Smile Sparkling


By following these tips, you can help keep your dog's teeth healthy and prevent dental problems down the road. Remember, a healthy mouth is a happy mouth, and a happy mouth means more smiles (and slobbery kisses) from your furry best friend! For more information on dog dental care, consult your veterinarian. For products to get you started, stop by our store.

By Makala Tronson October 27, 2025
Benefits of Bone Broth for Cats & Dogs
By Makala Tronson October 13, 2025
As the leaves change and the air turns crisp, it's the perfect time to cozy up with your canine companion and celebrate the flavors of fall! What better way to show your love than with some homemade, wholesome treats? Not only are these recipes easy to make, but they're also packed with seasonal ingredients that are safe and delicious for your furry friend. Plus, we've got some fantastic ideas for turning these treats into engaging enrichment activities using popular toys like Kongs and West Paw Toppls. Why Homemade is Best! Making your own dog treats allows you to control the ingredients, ensuring there are no artificial preservatives, colors, or unnecessary fillers. It's a wonderful way to tailor snacks to your dog's specific dietary needs or allergies. Fall-Inspired Treat Recipes Your Dog Will Adore! 1. Pumpkin Patch Bites Pumpkin is a fall superstar for dogs! It's rich in fiber, which aids digestion, and packed with vitamins. Ingredients: 1 cup canned pumpkin puree (make sure it's 100% pumpkin, not pie filling!) 1/2 cup unsweetened applesauce 2 eggs 2 cups whole wheat flour (or oat flour for a grain-free option) 1/2 teaspoon cinnamon (optional, in moderation) Instructions: Preheat your oven to 350°F (175°C). In a large bowl, mix the pumpkin puree, applesauce, and eggs until well combined. Gradually add the flour and cinnamon (if using), mixing until a thick dough forms. Roll out the dough on a lightly floured surface to about 1/4 inch thickness. Use a cookie cutter (fall shapes like leaves or pumpkins are fun!) to cut out treats. Place on a baking sheet lined with parchment paper. Bake for 20-25 minutes, or until golden brown and firm. Let cool completely before serving. Store in an airtight container for up to a week, or freeze for longer storage. 2. Apple & Carrot Crunchers Apples are a great source of vitamins A and C, and carrots offer beta-carotene. Always remove apple seeds and cores, as they contain small amounts of cyanide. Ingredients: 1 large apple, cored and finely grated (peel optional) 1 large carrot, peeled and finely grated 1/4 cup unsweetened applesauce 1 egg 1 3/4 cups whole wheat flour Instructions: Preheat oven to 350°F (175°C). In a bowl, combine grated apple, carrot, applesauce, and egg. Gradually mix in the flour until a stiff dough forms. Roll out the dough and cut into desired shapes. Bake for 25-30 minutes, or until firm and lightly browned. Cool completely before serving. 3. Sweet Potato Chews Sweet potatoes are another fall favorite, rich in vitamins, fiber, and antioxidants. These are super simple and make for a great chewy treat! Ingredients: 1 large sweet potato Instructions: Preheat oven to 250°F (120°C). Wash the sweet potato thoroughly and slice it into 1/4 inch thick rounds or stick shapes. No need to peel! Place slices on a baking sheet lined with parchment paper. Bake for 3-4 hours, flipping halfway through, until they are dried out and chewy (not crispy). The longer they bake at a low temperature, the chewier and longer-lasting they'll be. Let cool completely. Store in an airtight container in the refrigerator for up to 2 weeks. Fall Enrichment Toy Filling Ideas! Now that you've got some delicious homemade treats, let's talk about how to make them last longer and provide mental stimulation with enrichment toys! For Kongs (Classic & Extreme) Kongs are fantastic for stuffing because their unique shape makes it challenging for dogs to get all the goodies out. Pumpkin Powerhouse: Mix 1/2 cup canned pumpkin puree with a tablespoon of plain, unsweetened yogurt (dairy-free if preferred) and a sprinkle of crumbled Pumpkin Patch Bites. Freeze for extra challenge! Apple-Carrot Mash-Up: Combine finely mashed Apple & Carrot Crunchers with a spoonful of wet dog food or peanut butter (xylitol-free!). Sweet Potato Delight: Mash up some of your homemade Sweet Potato Chews with a bit of bone broth or a lick of cream cheese (in moderation). Layered Goodness: Start with a layer of peanut butter at the bottom, add some mashed banana mixed with crumbled treats, and top with a dollop of pumpkin puree. Freeze to extend the fun! For West Paw Toppls (Small & Large) Toppls are open-ended, making them great for softer, wider fillings and for dogs who might get frustrated with deep-cavity toys. They can also be connected for a bigger challenge! Toppl Trail Mix: Fill the bottom with a spread of pumpkin puree, then layer in small pieces of your Apple & Carrot Crunchers, some plain dog kibble, and a few small pieces of Sweet Potato Chews. Harvest Hash: Mix together cottage cheese (lactose-free if needed), a spoonful of canned pumpkin, and finely chopped cooked green beans. Freeze for a healthy, long-lasting treat. Broth-sicle Toppl: Stand the Toppl upright (you might need a small cup to stabilize it), fill it with a mix of dog-safe bone broth, a few small pieces of chicken or turkey, and a sprinkle of crumbled treats. Freeze until solid. "Deconstructed" Pie: Spread a layer of unsweetened applesauce, then add crumbles of Pumpkin Patch Bites, and top with a thin smear of cream cheese or plain Greek yogurt. Safety First! Always check ingredients: Before using any human food, ensure it is safe for dogs. Avoid grapes, raisins, chocolate, avocado, onions, garlic, and anything sweetened with xylitol. Introduce new foods slowly: Start with small amounts to monitor for any digestive upset. Portion control: Treats should only make up a small portion of your dog's daily caloric intake. Supervise: Always supervise your dog when they're enjoying enrichment toys, especially with new fillings. Embrace the cozy spirit of fall with these delightful and healthy homemade dog treats and engaging enrichment toy ideas. Your furry best friend will thank you with wagging tails and happy licks!
By Makala Tronson October 3, 2025
Why This Popular Chew is Not a Safe Treat and What to Choose Instead
By Makala Tronson July 30, 2025
The Good, The Better, and The Not-So-Great: Leash Types Explained
By Makala Tronson June 11, 2025
Summer brings glorious long walks and adventures in the great outdoors. But for dog owners, there's a hidden danger lurking in tall grasses that many don't even consider: the humble grass seed. These tiny, seemingly innocuous seeds can cause a surprising amount of pain, discomfort, and even serious health problems for our canine companions. At [Your Blog Name/Your Name], we want to ensure your pup stays happy and healthy all season long. So, let's shed some light on the sneaky dangers of grass seeds and how you can protect your dog. What Makes Grass Seeds So Dangerous? Grass seeds (often called "awns") might be small, but their unique structure makes them a formidable foe. Many varieties, particularly those from wild or unkempt grasses, have sharp, pointed ends and backward-pointing barbs. This design allows them to: Easily Attach: They readily cling to fur, especially in breeds with longer or feathery coats. Burrow Deep: Once attached, their barbed nature means they can only travel in one direction – forward. They can pierce the skin and then continue to burrow deeper into your dog's body. Carry Infection: As they burrow, they can drag bacteria and dirt with them, leading to painful infections and abscesses. Migrate: Alarmingly, once under the skin, a grass seed can travel a significant distance within the body, sometimes ending up in organs like the lungs or even near the spine, causing severe complications. Where Do Grass Seeds Typically Lodge? While a grass seed can technically get almost anywhere on a dog's body, certain areas are more common entry points due to their exposure during walks and play: Paws (Especially Between the Toes): This is one of the most frequent locations. Dogs pick them up as they walk, and the seeds can easily get stuck in the fur between their paw pads, then burrow into the soft skin. You might notice your dog excessively licking, limping, or a swollen, red area between their toes, sometimes with a small "weeping" hole. Ears: Floppy-eared breeds are particularly susceptible, but any dog can get a grass seed down their ear canal. Signs include vigorous head shaking, pawing at the ear, tilting their head to one side, or rubbing their ear on the ground. If left untreated, they can cause painful ear infections or even rupture the eardrum. Eyes: A grass seed can get lodged under the eyelid or behind the third eyelid, causing extreme irritation. Symptoms include excessive tearing, redness, squinting, or pawing at the eye. If not removed promptly, they can scratch the cornea and lead to serious eye damage or infection. Nose: Dogs who sniff along the ground can inhale grass seeds. This might lead to sudden and repeated sneezing, pawing at their nose, or even a bloody discharge from one nostril. Under the Skin (Anywhere on the Body): Seeds can also embed themselves in the armpits, groin, or any other area of the coat, creating a painful lump or abscess that your dog constantly licks or chews. What to Do If You Suspect a Grass Seed Problem: Act quickly! The sooner a grass seed is identified and removed, the less likely it is to cause severe problems. Inspect Thoroughly After Every Walk: This is your best defense! After any walk, especially through long grass or meadows, take a few minutes to check your dog from head to tail. Paws: Carefully spread their toes and check between the pads. Ears: Look inside the ear flap and as far down the canal as you can see. Coat: Run your hands through their fur, paying extra attention to their armpits, belly, and around their tail. Eyes and Nose: Gently check these areas for any foreign bodies or signs of irritation. Remove Visible Seeds (Carefully): If you spot a seed that hasn't penetrated the skin, you can try to carefully pick or brush it out. Contact Your Vet IMMEDIATELY If You Suspect a Seed Has Embedded: If your dog shows any of the symptoms mentioned above, or if you find a seed that has started to burrow into the skin, do not delay. Grass seeds rarely resolve on their own, and the longer they are left, the deeper they can travel and the more damage they can cause. Your vet may need to sedate your dog to properly examine the affected area and remove the seed, especially if it's in a painful or delicate spot. Prevention is Key! Avoid Long Grass: Whenever possible, steer clear of areas with tall, dry grass, especially during late spring and summer when seeds are prevalent. Keep Groomed: For long-haired breeds or those with feathery paws and ears, consider trimming the fur around these areas short. This makes it harder for seeds to cling and easier for you to spot them. Consider Protective Gear: For highly susceptible dogs, specialized booties can protect their paws, and snoods can help cover their ears during walks in grassy areas. By being vigilant and understanding the risks, you can help protect your beloved dog from the hidden dangers of grass seeds and ensure a safer, happier summer for you both.
By Makala Tronson June 11, 2025
Hot Dog! Keeping Your Canine Cool and Happy This Summer
By Makala Tronson April 10, 2025
What you need to know to have a fun and safe Easter with your dog.
By Makala Tronson January 10, 2025
How to keep your dog busy when the weather outside isn't cooperative
By Makala Tronson December 2, 2024
Dangers Posed to Pets at Christmas Time
By Makala Tronson July 31, 2024
Summertime means outdoor adventures for you and your furry friend. But lurking in those tall grasses is a tiny, yet potentially dangerous threat: grass seeds. These seemingly harmless little things can cause a world of trouble for your dog if not caught and removed promptly. How Grass Seeds Can Harm Your Dog Grass seeds are designed to stick, and they do just that to your dog's fur, paws, and even ears. Once embedded, they can cause a range of problems: Skin irritation: Grass seeds can cause redness, itching, and discomfort when lodged in your dog's fur or between their toes. Infection: If a grass seed penetrates the skin, it can carry bacteria, leading to painful and swollen infections. Serious complications: In rare but severe cases, grass seeds can migrate to other parts of the body, causing internal damage. Signs to Watch For Be on the lookout for these signs that your dog may have a grass seed problem: Excessive licking or chewing of paws Head shaking or tilting Pawing at the face Redness or swelling around the eyes or ears Discharge from the eyes or ears Lethargy or loss of appetite Preventing and Removing Grass Seeds Prevention is key to keeping your dog safe from grass seeds: Avoid walking your dog in tall grass, especially during dry weather when seeds are more likely to spread. Regularly check your dog's fur, ears, and paws for any signs of grass seeds. Trim the hair around your dog's paws and ears to reduce the risk of seeds getting caught. If you find a grass seed, try to remove it carefully with tweezers. If you can't easily remove the seed or if the area is red, swollen, or painful, contact your vet immediately. When to See a Vet It's important to seek professional help if: You can't remove the grass seed yourself. Your dog is showing signs of pain or discomfort. There's evidence of infection, such as redness, swelling, or pus. You suspect the grass seed has migrated to another part of the body. By taking precautions and being aware of the risks, you can help protect your furry friend from the dangers of grass seeds and ensure they enjoy a happy and healthy summer. Do you have any other questions about grass seeds or dog care?